Using Sensors with CircuitPython
Read I2C and GPIO sensors on a Raspberry Pi with CircuitPython for home automation and data logging.
Reading Analog and Digital sensor data with CircuitPython over Serial
You can use many sources of data to drive a Krill system. This is a basic intro into reading sensors of various types.
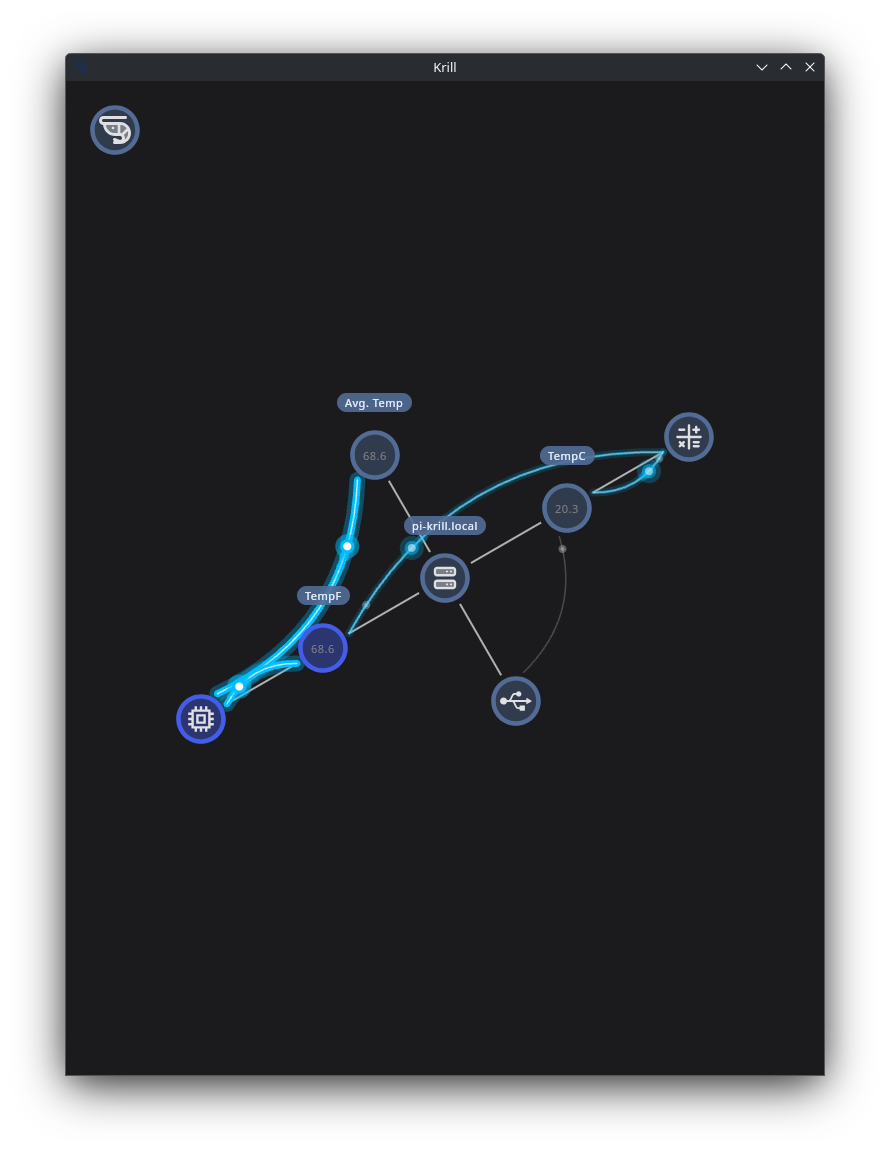 Reading a temperature sensor with a calculation to convert to Fahrenheit, storing the result in another data point, and a compute node to calculate hourly averages.
Hardware Setup
I’m using:

You should follow the instructions for setting up CircuitPython on your board, and then you can use the built in libraries to read from sensors. The main learning curve for this is that you plug the device into your computer and it shows up as a USB drive. You can then edit the code.py file on the drive to write your code. So you’re coding Python on the device itself, and it runs when you save the file.
The tutorial on AdaFruit’s website is a great place to start: Getting Started with CircuitPython.
The most important steps are:
- Attach the board to your USB port and drop the appropriate firmware file on it — it’ll reboot and show up as a drive. Your code goes in a file called
code.pyand it runs when you save. - Download this big zip of libraries. Most project involve you finding the right files in this zip and dropping them on the drive in a folder called
lib. You can also use the CircuitPython Library Bundle to find the specific libraries you need for your sensors. - Use an editor like Mu to edit the
code.pyfile on the drive. This is a simple editor that is designed for CircuitPython and makes it easy to write and upload code to the device.
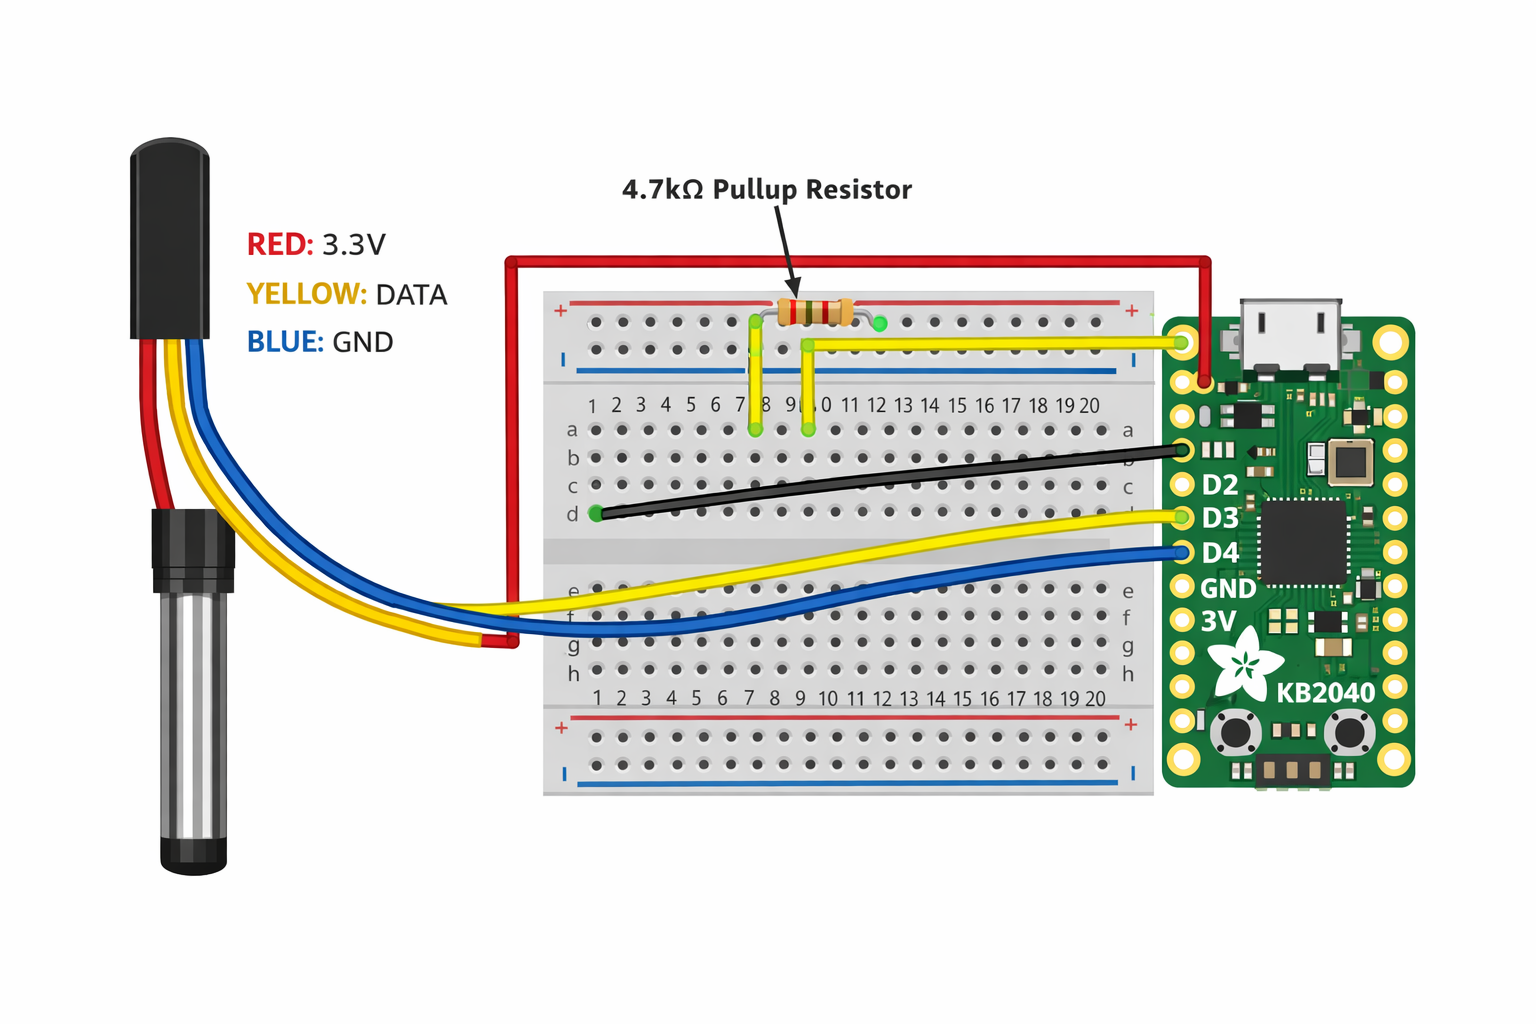
I hooked the yellow data wire to pin D2, the red power wire to 3.3V, and the black ground wire to GND. I also added a 4.7K pull-up resistor between the data line and the power line, which is necessary for the DS18B20 to work properly.
1
2
3
4
5
6
7
8
9
10
11
12
13
14
15
16
17
18
import time
import board
from adafruit_onewire.bus import OneWireBus
from adafruit_ds18x20 import DS18X20

# Change D2 if you used a different pin for the yellow DATA wire
ow_bus = OneWireBus(board.D2)

devices = ow_bus.scan()
print("Devices found:", len(devices))

if not devices:
    raise RuntimeError("No DS18B20 found. Check wiring and the 4.7K pull-up resistor.")

for i, device in enumerate(devices):
    print("Device", i, "ROM:", [hex(x) for x in device.rom], "Family:", hex(device.family_code))
Configure Krill
In the code sample I print out just the raw value in celcius. You’re not limited to what your input and output looks like but a single digit can be recored to a datapoint directly.
You have plenty of options to record your data as text and have a Python Lambda execute to parse it and save results to other downstream data source like another Data Point or as the Post Body of a webhook thie reading can trigger
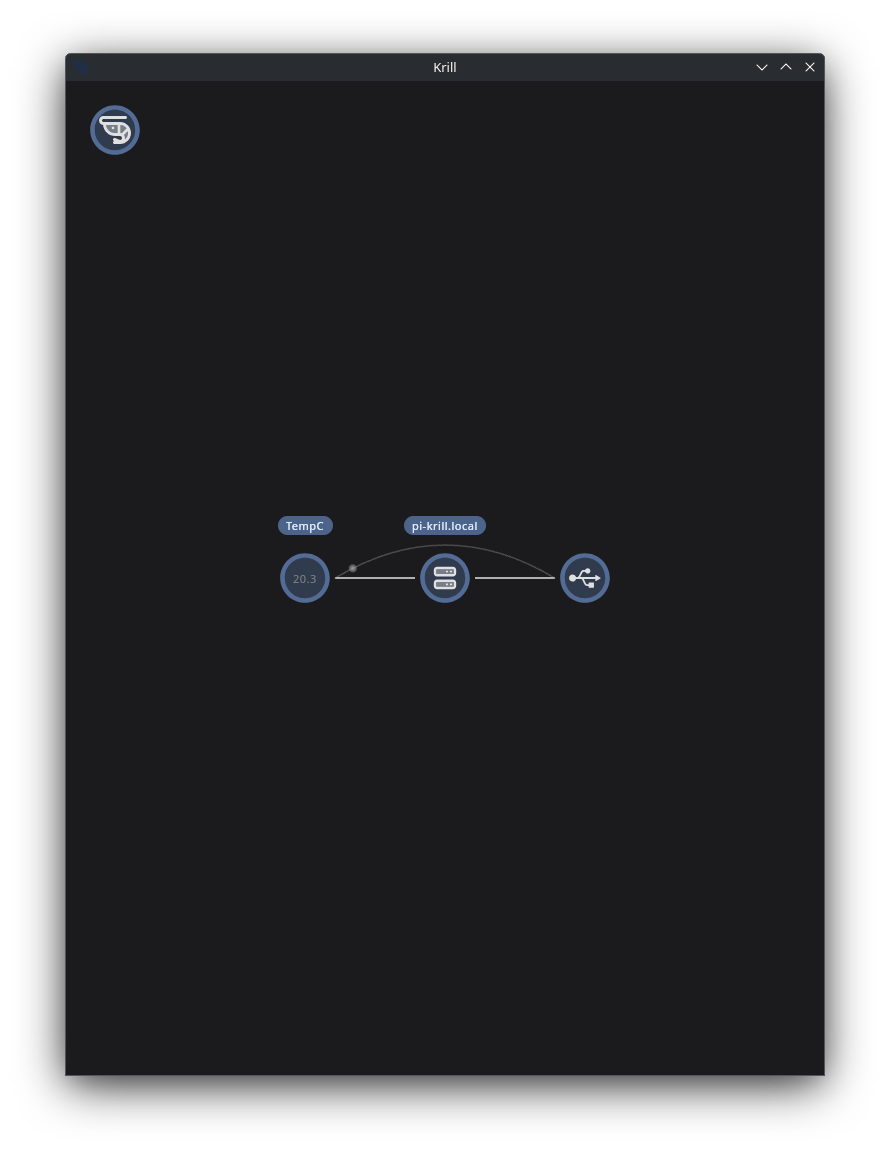
Connect the Sensor to the USB port of a krill server
You should see a new device listed in the server’s /dev/serial/by-id directory. Adding a new serial device using the Krill App and configure it for your device, selecting it from the dropdown.
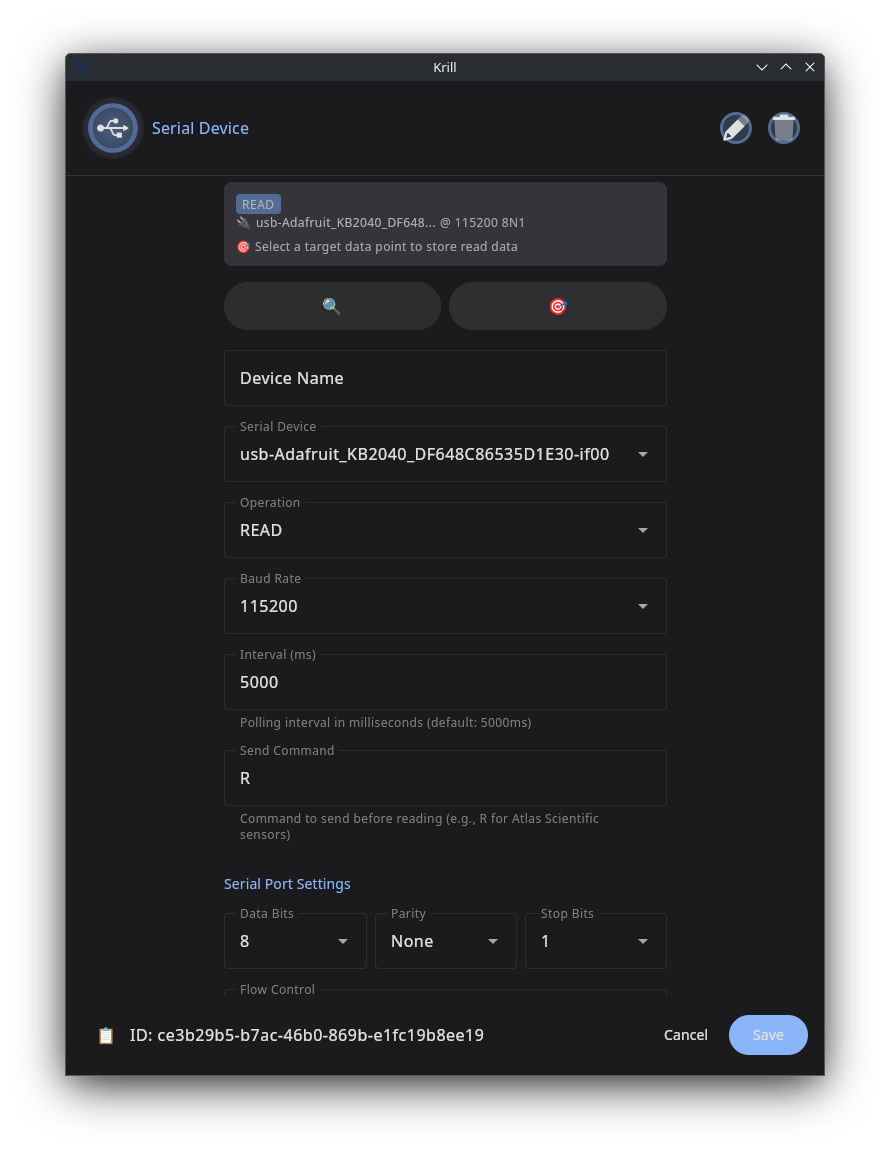
Create a data point and select it as the target to store the sensor data.
You can now use your sensor data as part of any workflow including:
- Trigger a calculation to convert the value to fahrenheit and store that in another data point
- Trigger a webhook to send the data to another system
- Trigger a notification if the temperature exceeds a certain threshold
- Turn on a heater with a Zigbee Device or Relay if the temperature drops below a certain threshold
Reading I2C Sensors Directly on the Pi
If your sensor connects directly to the Raspberry Pi’s I2C bus (like the TCS34725 color sensor), you can read it with a Lambda script using CircuitPython — no external microcontroller needed. See the CO2 Reactor with Color Sensor for a real-world example that uses a color sensor to monitor pH indicator solution and trigger automated shutoff.
Related
- CircuitPython Sensors via Lambda — Read I2C sensors directly on the Pi
- Color Data Points and Triggers — Store and trigger on color sensor data
- CO2 Reactor with Color Sensor — Full build guide with automated feedback control
Last verified: 2026-04-06